
Spring Security学习记录基础版(一)
1.概要
- Spring Security的核心功能
- 用户认证:就是系统认为用户是否登录
- 用户授权:就是系统判断用户是否有权限去做某些事情
2.Hello Security
创建一个SpringBoot工程
引入相关依赖
1
2
3
4
5
6
7
8<dependency>
<groupId>org.springframework.boot</groupId>
<artifactId>spring-boot-starter-security</artifactId>
</dependency>
<dependency>
<groupId>org.springframework.boot</groupId>
<artifactId>spring-boot-starter-web</artifactId>
</dependency>
编写controller测试
1
2
3
4
5
6
7
8
9
@RestController
@RequestMapping("quick")
public class QuickController {
@GetMapping("/hello")
public Object hello(){
return "hello security";
}
}
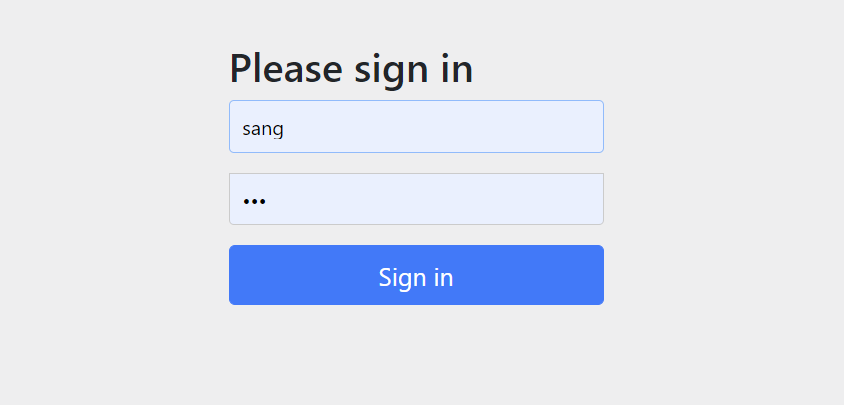
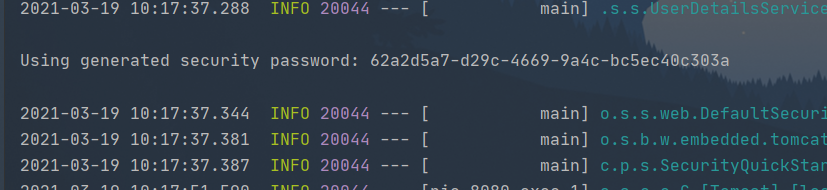
测试结果:security启动默认会有一个登录页,security默认得用户名是:user 密码每次执行会在控制台打印,登录成功后显示测试结果

3.SpringSecurity基本原理
SpringSecurity本质是一个过滤器链,由很多过滤器组成
FilterSecurityInterceptor:是一个方法级的权限过滤器,基本位于过滤链的最底部
ExceptionTranslationFilter:是个异常过滤器,用来处理在认证授权过程中的异常
UsernamePasswordAuthenticationFilter:对/login的POST请求做拦截,校验表单中用户名,密码
SpringSecurity两个重要的接口
- UserDetailsService接口:查询数据库用户名和密码的过程
- 创建类继承UsernamePasswordAuthenticationFilter,重写三个方法
- 创建类实现UserDetailService,编写查询数据过程,返回User对象,这个User对象是Security提供的对象
- PasswordEncoder接口:数据加密接口,用于返回User对象里面密码加密
- UserDetailsService接口:查询数据库用户名和密码的过程
4.security设置用户和密码
通过配置文件设置(了解)
1
2
3
4
5
6
7
spring:
security:
user:
name: admin
password: 123456
roles: root
通过配置类设置(了解)
1
2
3
4
5
6
7
8
9
10
11
12
13
14
15
16
17
18
19
@Configuration
public class SecurityConfig extends WebSecurityConfigurerAdapter {
@Autowired
PasswordEncoder passwordEncoder;
@Override
protected void configure(AuthenticationManagerBuilder auth) throws Exception {
//将密码加密
String password = passwordEncoder.encode("123456");
auth.inMemoryAuthentication().withUser("test")
.password(password).roles("test");
}
//不加这一步会报@PreAuthorizeConsider defining a bean of type 'org.springframework.security.crypto.password.PasswordEncoder' in your configuration.
@Bean
public PasswordEncoder passwordEncoder() {
return new BCryptPasswordEncoder();
}
}自定义实现类设置
第一步 创建配置类,设置使用哪个userDetailsService实现类
1
2
3
4
5
6
7
8
9
10
11
12
13
14
@Configuration
public class MySecurityConfig extends WebSecurityConfigurerAdapter {
@Autowired
private UserDetailsService userDetailsService;
@Override
protected void configure(AuthenticationManagerBuilder auth) throws Exception {
auth.userDetailsService(userDetailsService).passwordEncoder(passwordEncoder());
}
@Bean
public PasswordEncoder passwordEncoder() {
return new BCryptPasswordEncoder();
}
}
第二步 编写实现类,返回User对象,User对象有用户名密码和操作权限
1
2
3
4
5
6
7
8
9
@Service
public class MyUserDetailsService implements UserDetailsService {
@Override
public UserDetails loadUserByUsername(String s) throws UsernameNotFoundException {
List<GrantedAuthority> auths = AuthorityUtils.commaSeparatedStringToAuthorityList("role");
return new User("test",new BCryptPasswordEncoder().encode("123"),auths);
}
}
5.查询数据库完成用户认证
引入相关依赖
1
2
3
4
5
6
7
8
9
10
11
12
13
14
15
16
17
18
19
20
21
22
23<dependency>
<groupId>org.springframework.boot</groupId>
<artifactId>spring-boot-starter-security</artifactId>
</dependency>
<dependency>
<groupId>org.springframework.boot</groupId>
<artifactId>spring-boot-starter-web</artifactId>
</dependency>
<dependency>
<groupId>com.baomidou</groupId>
<artifactId>mybatis-plus-boot-starter</artifactId>
<version>3.4.2</version>
</dependency>
<dependency>
<groupId>mysql</groupId>
<artifactId>mysql-connector-java</artifactId>
<version>8.0.23</version>
</dependency>
<dependency>
<groupId>org.projectlombok</groupId>
<artifactId>lombok</artifactId>
<optional>true</optional>
</dependency>
创建数据库
1
2
3
4
5
6
7
8
9
10
CREATE DATABASE test
USE test
CREATE TABLE users(
id INT(10) PRIMARY KEY AUTO_INCREMENT,
uname VARCHAR(30) NOT NULL,
upassword VARCHAR(80) NOT NULL
)
INSERT INTO users VALUES (DEFAULT,'admin','123456');
INSERT INTO users VALUES (DEFAULT,'test','123');
INSERT INTO users VALUES (DEFAULT,'root','123456')
配置数据库相关信息
1
2
3
4
5
6
spring:
datasource:
driver-class-name: com.mysql.cj.jdbc.Driver
url: jdbc:mysql://localhost:3306/test?serverTimezone=GMT%2B8
username: root
password: 123456
创建users表对应实体类
1
2
3
4
5
6
7
8
9
@Data
@AllArgsConstructor
@NoArgsConstructor
public class Users {
private long id;
private String uname;
private String upassword;
}
整合mybatisPlus,创建接口,继承mp的接口
1
2
3
public interface UserMapper extends BaseMapper<Users> {
}
在MyUserDetailsService调用mapper里面的方法查询数据库进行用户认证
1
2
3
4
5
6
7
8
9
10
11
12
13
14
15
16
17
18
19
20
@Service
public class MyUserDetailsService implements UserDetailsService {
@Autowired
UserMapper userMapper;
@Override
public UserDetails loadUserByUsername(String username) throws UsernameNotFoundException {
//mybatisplus提供的条件构造器
QueryWrapper<Users> wrapper = new QueryWrapper();
//下面这句话等同于where uname=?
wrapper.eq("uname",username);
//因为用户名不能重复,使用selectOne得到某一条数据
Users user = userMapper.selectOne(wrapper);
if(user == null){
throw new UsernameNotFoundException("用户不存在");
}
List<GrantedAuthority> auths = AuthorityUtils.commaSeparatedStringToAuthorityList("role");
//查询数据库得到的user对象的用户名和密码返回给security提供的User对象里面
return new User(user.getUname(),new BCryptPasswordEncoder().encode(user.getUpassword()),auths);
}
}
在启动类上添加@MapperScan注解
1
2
3
4
5
6
7
8
@SpringBootApplication
@MapperScan("com.project.securityquickstart.mapper")
public class SecurityQuickStartApplication {
public static void main(String[] args) {
SpringApplication.run(SecurityQuickStartApplication.class, args);
}
}
启动测试
1
2
3
4
5
6
7
8
@RestController
@RequestMapping("quick")
public class QuickController {
@GetMapping("/hello")
public Object hello(){
return "hello security";
}
}测试成功,三个账号都可以进行登录,但是启动时出现如下警告: This primary key of “id” is primitive !不建议如此请使用包装类 in Class: “com.project.securityquickstart.bean.Users”
6.自定义登录页
配置类编写相关的配置
1
2
3
4
5
6
7
8
9
10
11
12
@Override
protected void configure(HttpSecurity http) throws Exception {
http.formLogin() //自定义自己的登录页面
.loginPage("/login.html") //登录页面设置
.loginProcessingUrl("/quick/login") //登录页访问路径
.defaultSuccessUrl("/quick/index").permitAll() //登录成功后跳转的地址
.and().authorizeRequests()
//配置不用认证就能访问的页面
.antMatchers("/","/quick/login","/quick/hello").permitAll()
.anyRequest().authenticated()
.and().csrf().disable(); //关闭csrf防护
}
创建登录的页面
1
2
3
4
5
6
7
8
9
10
11
12
13
14
<!DOCTYPE html>
<html lang="en">
<head>
<meta charset="UTF-8">
<title>security自定义登录页</title>
</head>
<body>
<form action="/quick/login" method="post">
<input type="text" name="username"/>
<input type="password" name="password"/>
<input type="submit" value="Login"/>
</form>
</body>
</html>
编写controller测试
1
2
3
4
5
6
7
8
9
10
11
12
@RestController
@RequestMapping("quick")
public class QuickController {
@GetMapping("/hello")
public Object hello(){
return "hello security";
}
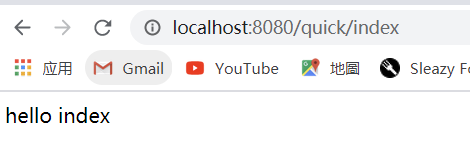
@GetMapping("/index")
public Object login(){
return "hello index";
}
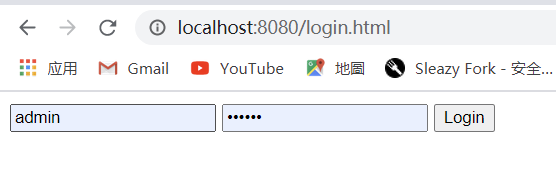
}效果图
当我输入http://localhost:8080/quick/index的时候会自动跳转登录页
登录成功后会跳转到配置类里配置的/quick/index的controller
7.基于权限进行访问控制
如果当前的主体具有指定权限,则返回true,否则返回false
没有访问权限 403
hasAuthority和hasAnyAuthority方法的使用实例
在配置类编写基于权限进行访问控制的相关配置
1
2
3
4
5
6
7
8
9
10
11
12
13
14
15
16
@Override
protected void configure(HttpSecurity http) throws Exception {
http.formLogin() //自定义自己的登录页面
.loginPage("/login.html") //登录页面设置
.loginProcessingUrl("/quick/login") //登录页访问路径
.defaultSuccessUrl("/quick/index").permitAll() //登录成功后跳转的地址
.and().authorizeRequests()
//配置访问权限为admins的才能访问/quick/index,只能配置单个
// .antMatchers("/quick/index").hasAuthority("admins")
//配置访问权限为admins和role的都能访问/quick/index,可配置多个
.antMatchers("/quick/index").hasAnyAuthority("admins,role")
//配置不用认证就能访问的页面
.antMatchers("/","/quick/login","/quick/hello").permitAll()
.anyRequest().authenticated()
.and().csrf().disable(); //关闭csrf防护
}
在MyUserDetailsService里配置用户的访问权限
1
List<GrantedAuthority> auths = AuthorityUtils.commaSeparatedStringToAuthorityList("role");
8.基于角色进行访问控制
如果当前主题具有指定角色,则返回true
hasRole和hasAnyRole使用实例
在配置类编写基于角色进行访问控制的相关配置
1
2
3
4
//配置角色为root的才能访问/quick/index,只能配置单个角色
// .antMatchers("/quick/index").hasRole("root")
//配置角色为root和admin中的一个的就能访问/quick/index,可配置多个角色
.antMatchers("quick/index").hasAnyRole("root,admin")在MyUserDetailsService里配置用户的角色
1
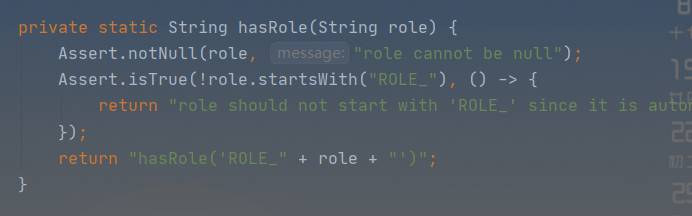
List<GrantedAuthority> auths = AuthorityUtils.commaSeparatedStringToAuthorityList("role,ROLE_root,ROLE_admin");注意:security底层的hasRole和hasAnyRole方法会给你加上”ROLE_”的前缀,在配置用户角色的时候要记得加上
9.自定义403页面
在配置类中编写
1
http.exceptionHandling().accessDeniedPage("/unauth.html");编写unauth.html页面,效果图:
10.注解的使用
10.1@Secured –用户具有某个角色,可以访问方法
在启动类或配置类开启注解
1
2
3
4
5
6
7
@EnableGlobalMethodSecurity(securedEnabled = true)
public class SecurityQuickStartApplication {
public static void main(String[] args) {
SpringApplication.run(SecurityQuickStartApplication.class, args);
}
}
- 在controller添加@Secured能够访问的角色
1 | |
在MyUserDetailsService查看有没有配置能访问的角色并测试
1
List<GrantedAuthority> auths = AuthorityUtils.commaSeparatedStringToAuthorityList("role,admins,ROLE_root");
10.2@PreAuthorize –在进入方法之前进行权限和角色验证
在启动类或配置类开启注解
1
@EnableGlobalMethodSecurity(securedEnabled = true,prePostEnabled = true)在在controller添加@PreAuthorize能够访问的角色和权限
1
2
3
4
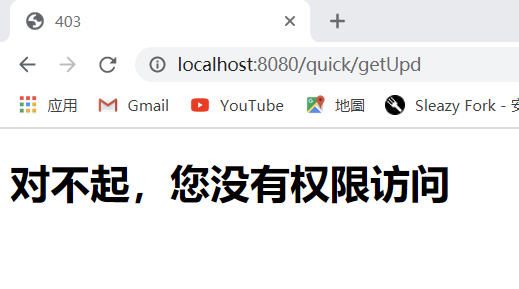
5@GetMapping("/getUpd")
@PreAuthorize("hasAuthority('role')")
public Object upd(){
return "hello,update";
}在MyUserDetailsService查看有没有配置能访问的角色并测试
这个注解里面可以写hasRole、hasAnyRole、hasAuthority和hasAnyAuthority
10.3@PostAuthorize –在方法执行之后进行权限和角色验证
在启动类或配置类开启注解 –同上
在controller添加@PreAuthorize能够访问的角色和权限
1
2
3
4
5
6
7
8
9@GetMapping("/getUpd")
// @Secured("ROLE_root")
// @PreAuthorize("hasAuthority('role')")
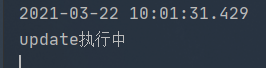
@PostAuthorize("hasAuthority('role')")
public Object upd(){
System.out.println("update执行中");
return "hello,update";
}
}在MyUserDetailsService查看有没有配置能访问的角色并测试,测试发现虽然没权限访问,但是里面的方法还是打印了
- 这个注解里面可以写hasRole、hasAnyRole、hasAuthority和hasAnyAuthority
10.4@PostFilter –方法返回的数据进行过滤
在controller注解中添加@PostFilter 需要过滤的数据,可以搭配上面的注解一起使用
1
2
3
4
5
6
7
8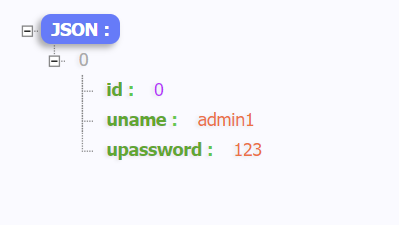
9@GetMapping("/getAll")
@PreAuthorize("hasAuthority('role')")
@PostFilter("filterObject.uname == 'admin1'")
public List<Users> getAll(){
List<Users> list = new ArrayList<Users>();
list.add(new Users(0,"admin1","123"));
list.add(new Users(0,"admin2","123"));
return list;
}
测试结果,只返回指定过滤的值
10.5@PreFilter –方法传入的数据进行过滤
- 暂时还不知道怎么用,出现如下错误
1 | |
11.用户注销
在登录页添加一个退出的超链接
1
<a href="/logout">注销</a>
在配置类中添加退出映射地址
1
http.logout().logoutUrl("/logout").logoutSuccessUrl("/quick/exit").permitAll();
测试类测试
1
2
3
4
@GetMapping("/exit")
public Object exit(){
return "注销成功。。。。";
}测试结果注销是能注销,但是在访问其他方法不需要登录验证了
12.自动登录
创建保存用户token的数据库
1
2
3
4
5
6
7
CREATE TABLE persistent_logins(
username VARCHAR(64) NOT NULL,
series VARCHAR(64) NOT NULL,
token VARCHAR(64) NOT NULL,
last_used TIMESTAMP NOT NULL DEFAULT CURRENT_TIMESTAMP ON UPDATE CURRENT_TIMESTAMP,
PRIMARY KEY(series)
)ENGINE = INNODB DEFAULT CHARSET=utf8;配置类,注入数据源,配置操作数据库对象
1
2
3
4
5
6
7
8
@Autowired
private DataSource dataSource;
@Bean
public PersistentTokenRepository persistentTokenRepository(){
JdbcTokenRepositoryImpl jdbcTokenRepository = new JdbcTokenRepositoryImpl();
jdbcTokenRepository.setDataSource(dataSource);
return jdbcTokenRepository;
}
配置类中配置自动登录
1
2
3
.and().rememberMe().tokenRepository(persistentTokenRepository())
//配置自动登录的有效时间 .tokenValiditySeconds(120)
.userDetailsService(userDetailsService)
在登录页面添加复选框
1
2
/*name必须叫remember-me,因为security内部封装了只识别这个名字的方法*/
<input type="checkbox" name="remember-me" title="自动登录"> 自动登录
13.csrf防护
- 默认开启的,了解就行
- Post title:Spring Security学习记录基础版(一)
- Post author:周瑜
- Create time:2021-03-23 15:54:48
- Post link:https://xinblog.github.io/2021/03/23/security-md/
- Copyright Notice:All articles in this blog are licensed under BY-NC-SA unless stating additionally.